Storage
Contents
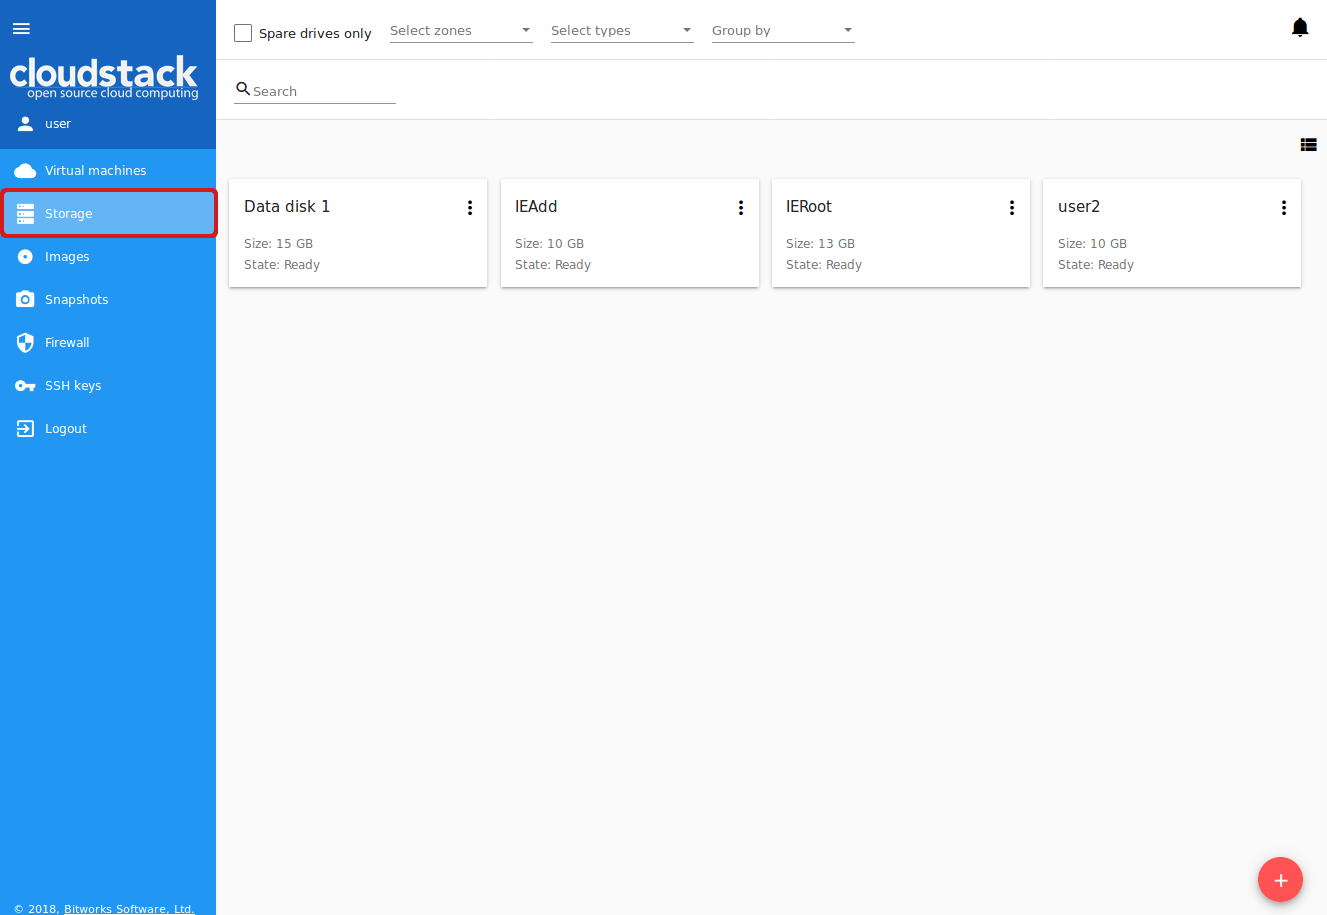
In the Virtual Machines -> Storage section, you can create and manage drives for virtual machines. Here you can add new disks, create templates and snapshots of a volume, view the list of snapshots for each volume.
Drive list
Note
If you have just started working with CloudStack and you do not have virtual machines yet, you have no disks in the list. Once you create a VM, a root disk is created for it automatically. Creation of an additional disk takes resources and requires expenses. Please, make sure you definitely need an additional data disk.
Here you can find a list of disks existing for your user.
Domain Administrator can see disks of all accounts in the domain.

Disks can be viewed as a list or as a grid of cards. Switch the view by clicking a view icon ![]() /
/![]() in the upper-right corner.
in the upper-right corner.
Filtering of Drives
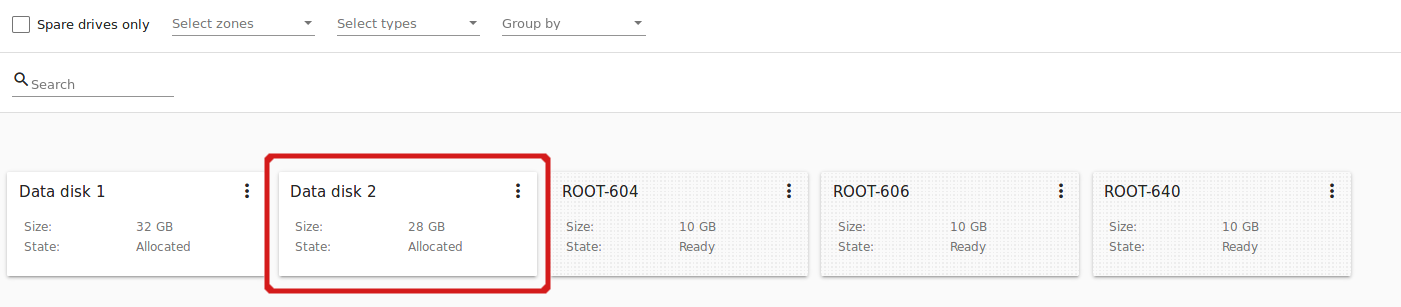
Root disks are visually distinguished from data disks in the list. There is an option to display only spare disks which allows saving user’s time in certain cases.
As in all lists, there is the filtering tool for selecting drives by zones and/or types. You also can apply the search tool selecting a drive by its name or a part of the name.

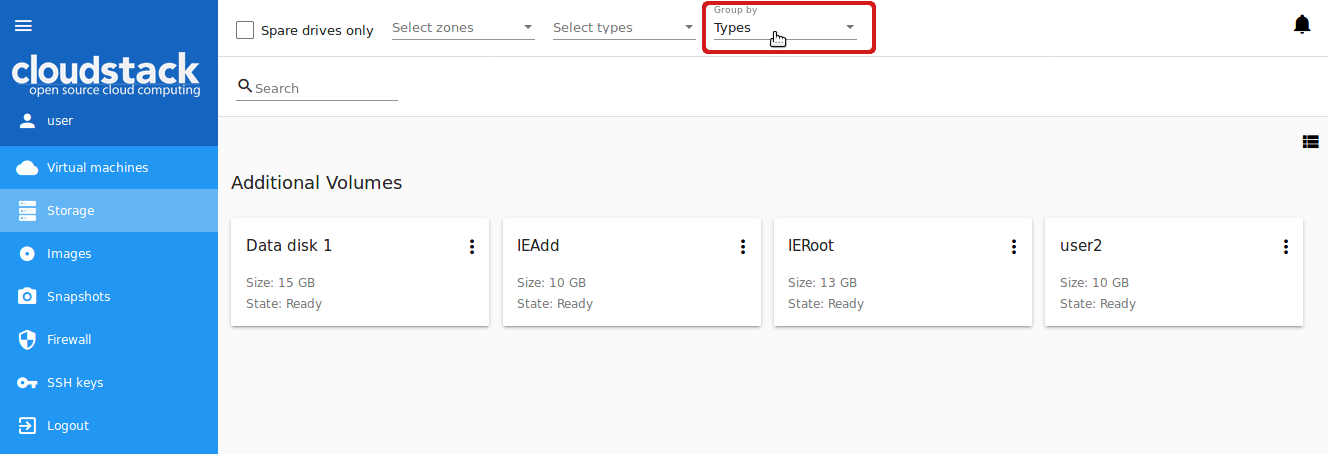
For better distinguising of drives in the list you can group them by zones and/or types, like in the figure below:
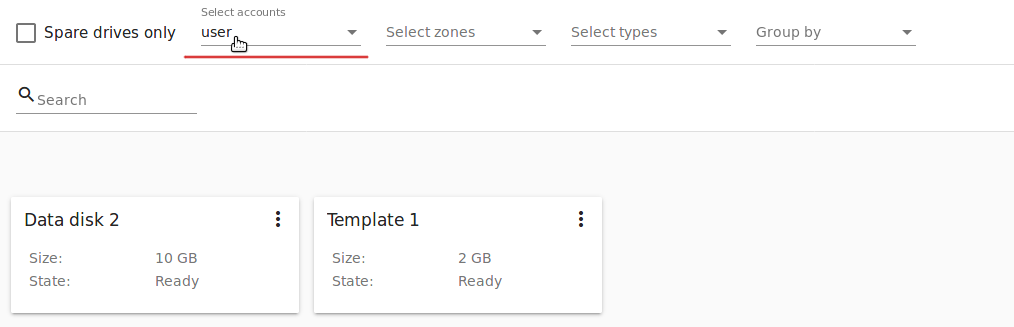
Domain Administrators can see the list of drives of all accounts in the domain. Filtering by accounts is available to Administrators.
For each drive in the list the following information is presented:
- Drive name,
- Size,
- State - Ready or Allocated.
The Actions button ![]() is available to the right. It expands the list of actions for a disk. See the information on actions in the Volume Action Box section below.
is available to the right. It expands the list of actions for a disk. See the information on actions in the Volume Action Box section below.
Create New Volume
In the Storage section you can create new volumes. Please, note that if you are aimed at creation of a virtual machine, we do not recommend starting from adding new disks to the system. You can go right to the Virtual Machines section and create a VM. A root disk will be cerated for the VM automatically.
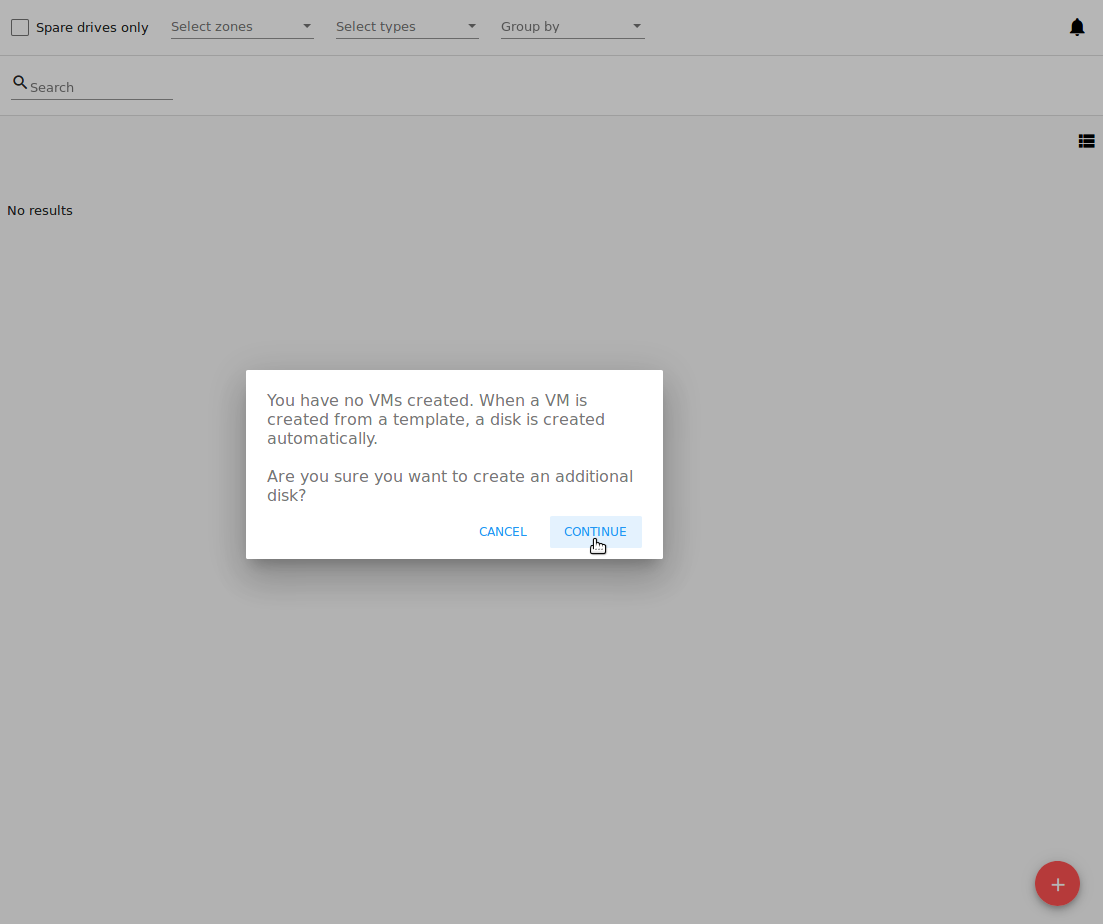
If necessary, you can create a data disk and attach it to your VM. By clicking the “Create” button ![]() in the bottom-right corner you will open a creation form. Please, make sure you definitely need an additional disk as it takes resources and requires expenses. If you do not have disks yet, when clicking “Create”, a dialog box will ask you if you surely want to create a drive. Confirm your creation action by clicking “CONTINUE”:
in the bottom-right corner you will open a creation form. Please, make sure you definitely need an additional disk as it takes resources and requires expenses. If you do not have disks yet, when clicking “Create”, a dialog box will ask you if you surely want to create a drive. Confirm your creation action by clicking “CONTINUE”:
A creation form will appear.
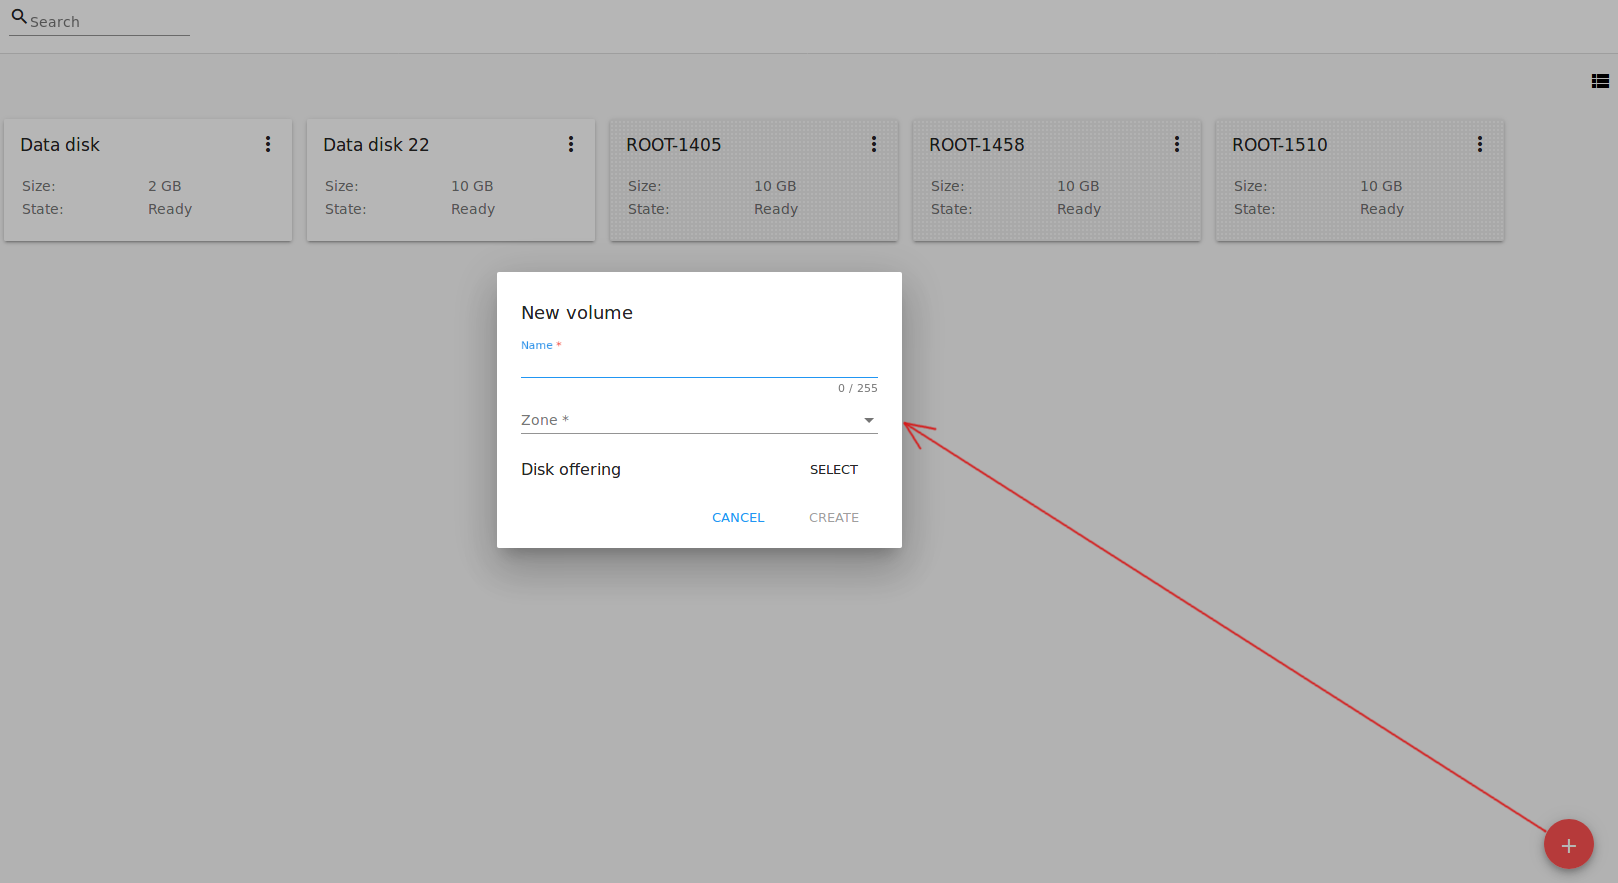
To create a new volume fill in the fields:
Note
Required fields are marked with an asterisk (*).
- Name * - Enter a name of the volume.
- Zone * - Select a zone from the drop-down list.
- Disk offering * - Select from the list of available offerings opening it in a modal window by clicking “SELECT”. The list of available disk offerings is determined in the configuration file by Administrator.
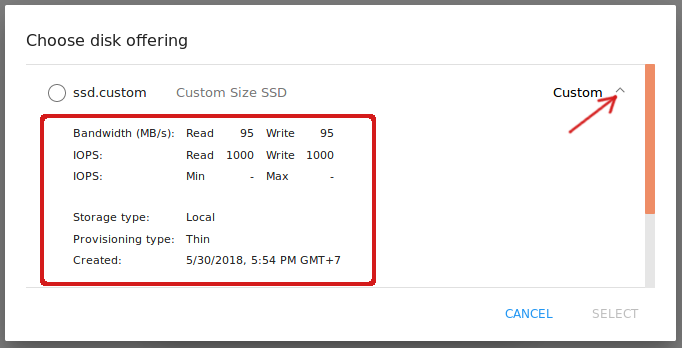
In the modal window you can see the name and short description for each disk offering and a radio-button to select any option.

For each disk offering you can expand detailed information by clicking the arrow icon or the whole line in the list. In the appeared section you will see a range of parameters. The following parameters are shown by default:
- Bandwidth (MB/s): Read/Write rates;
- IOPS: Read/Write rates and Min/Max values;
- Storage type;
- Provisioning type;
- Creation date.
Use the scrolling tool to view them all.
More parameters can be added via the configuration file by an Administrator.
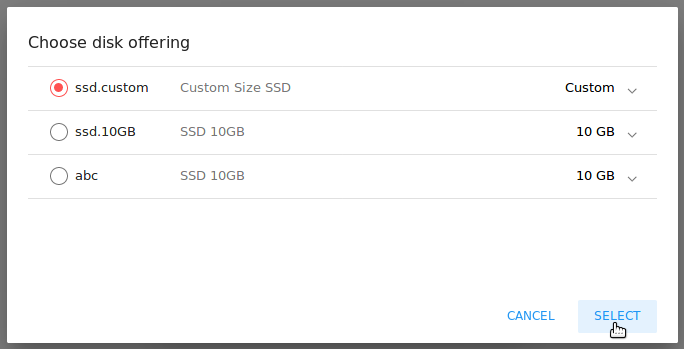
Select a disk offering in the list and click “SELECT”.
If the selected disk offering has a custom disk size (it is set by Administrator), you can change the disk size moving the slider to the volume size you wish or entering a value into the number field.
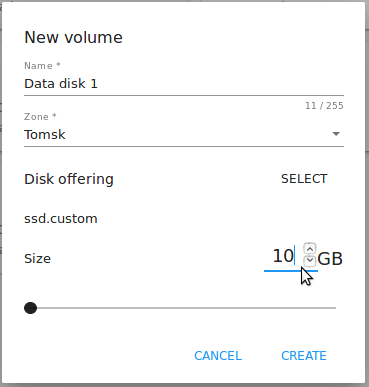
Click “CREATE” to save the settings and create the new volume. You will see the drive appears in the list.
Click “CANCEL” to drop all the settings. The drive will not be created then.
Volume Details Sidebar
By clicking a disk in the list you can access the information on the volume.
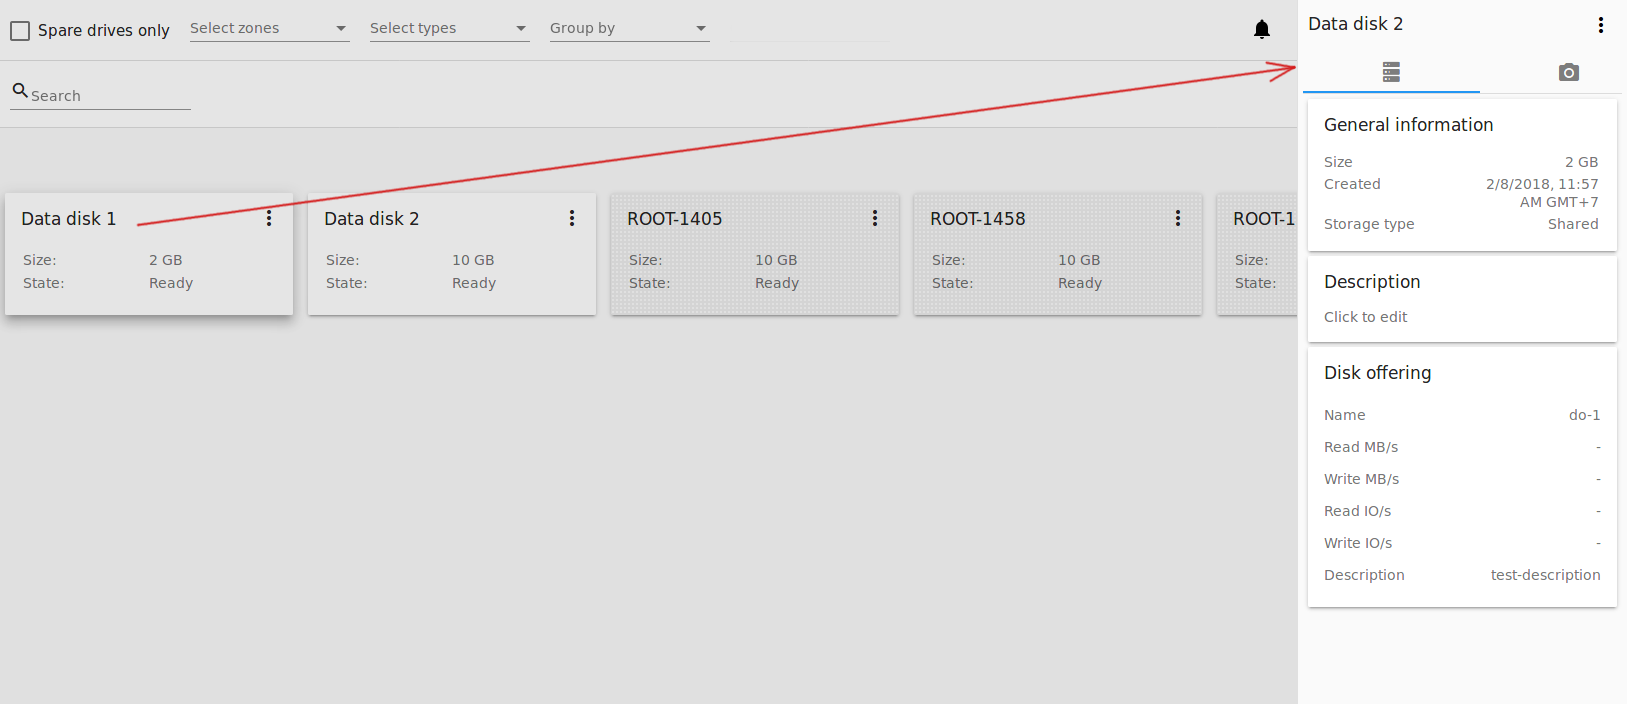
At the right sidebar you can find two tabs:
- Volume tab - Provides the information on the disk volume:
- General information - Presents disk size, date and time of creation, the storage type (shared, local).
- Description - Allows entering a short description to the drive. Click at the Description card and enter a short description in the text block.
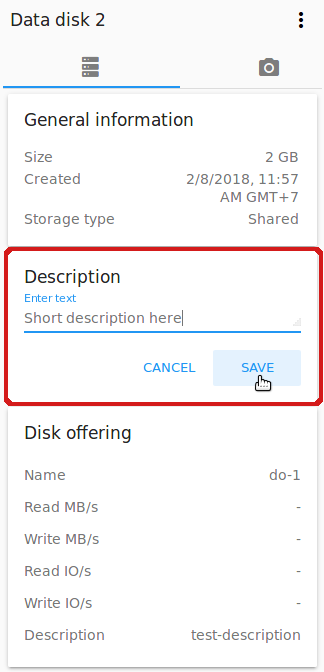
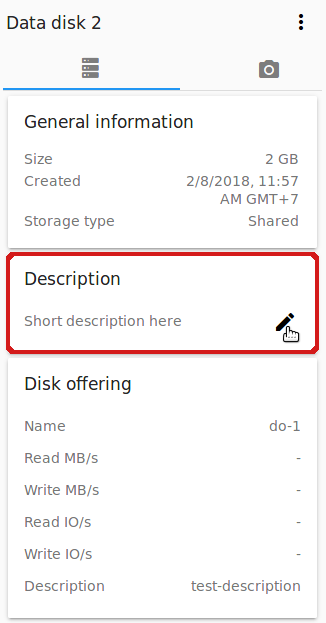
Click “Save” to save the description. Description will be saved to volume tags.
You can edit the description by clicking the “Edit” button ![]() in the tab.
in the tab.
- Disk offering - Presents the information on the disk offering chosen at disk creation.
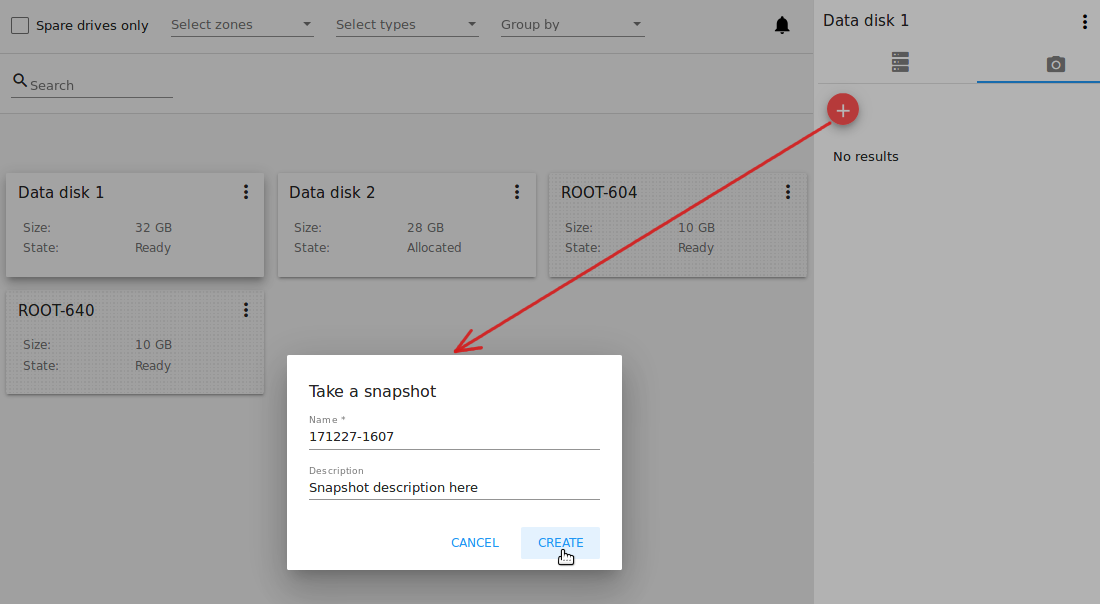
Snapshots tab - Allows creating disk snapshots. Snapshots can be taken for disks with the “Ready” status only.
Click the “Add” button
 and enter in the dialog box:
- Name - Define a name for the snapshot. It is auto-generated in the format
<date>-<time>. But you can specify any name you wish. - Description - Add a description of the snapshot to know what it contains.
Then click “Create” and see the snapshot has appeared in the list.
- Name - Define a name for the snapshot. It is auto-generated in the format
Every snapshot is saved in a separate card. There you will see the name and time of the snapshot.
For each snapshot the list of actions is available. Find more information on snapshot actions in the Snapshots Action Box section below.
Snapshots Action Box
Note
For a newly taken snapshot all actions except “Delete” are disabled until the snapshot is backed up to the Secondary Storage that may take some time. Once it is backed up, a full range of actions is available to a user.
Likewise the Virtual Machine information tab, the same actions are available for a snapshot:
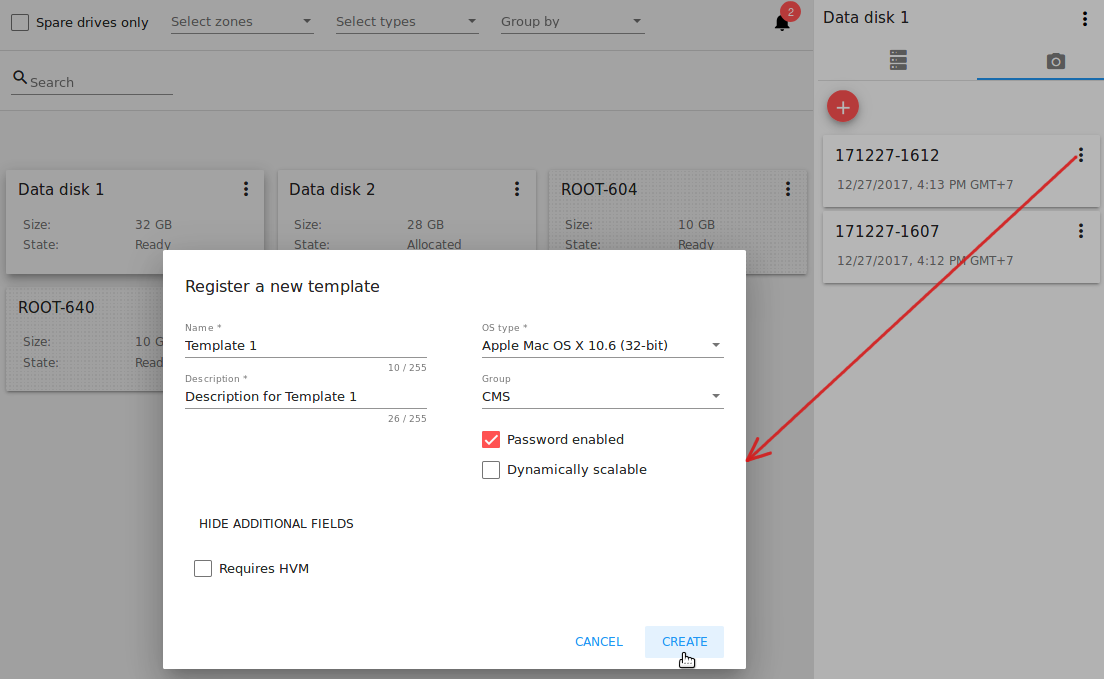
- Create a template - Allows creating a template from the snapshot. This template can be used for VM creation.
Fill in the form to register a new template:
Note
Required fields are marked with an asterisk (*).
- Name * - Enter a name of the new template.
- Description * - Provide a short description of the template.
- OS type * - Select an OS type from the drop-down list.
- Group - Select a group from the drop-down list.
- Password enabled - Tick this option if the template has the password change script installed. That means the VM created on the base of this template will be accessed by a password, and this password can be reset.
- Dynamically scalable - Tick this option if the template contains XS/VM Ware tools to support the dynamic scaling of VM CPU/memory.
Click “SHOW ADDITIONAL FIELDS” to expand the list of optional settings. It allows creating a template that requires HVM.
Once all fields are filled in click “Create” to create the new template.
- Create Volume - Allows creating a volume from the snapshot.
Type a name for a new volume into the Name field in the modal window. Click “Create” to register a new volume.
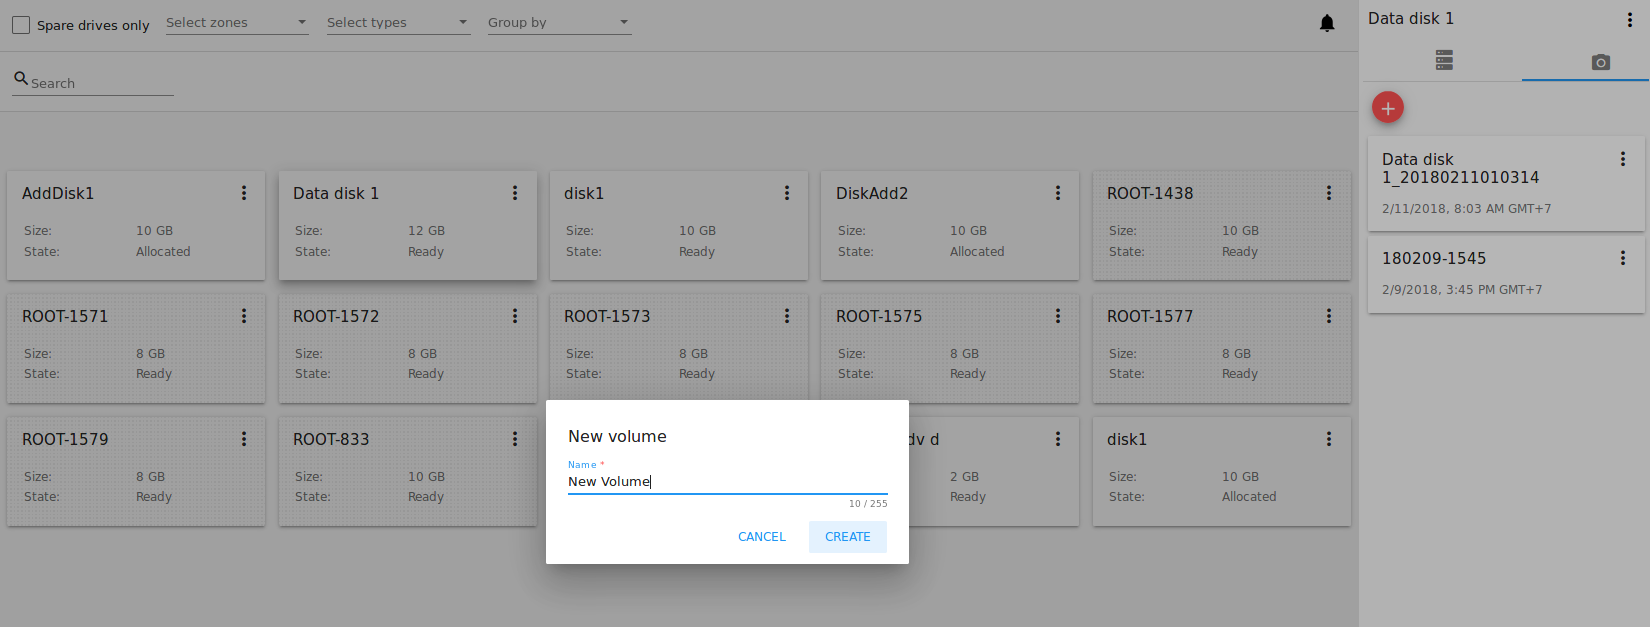
Click “Cancel” to cancel the volume creation.
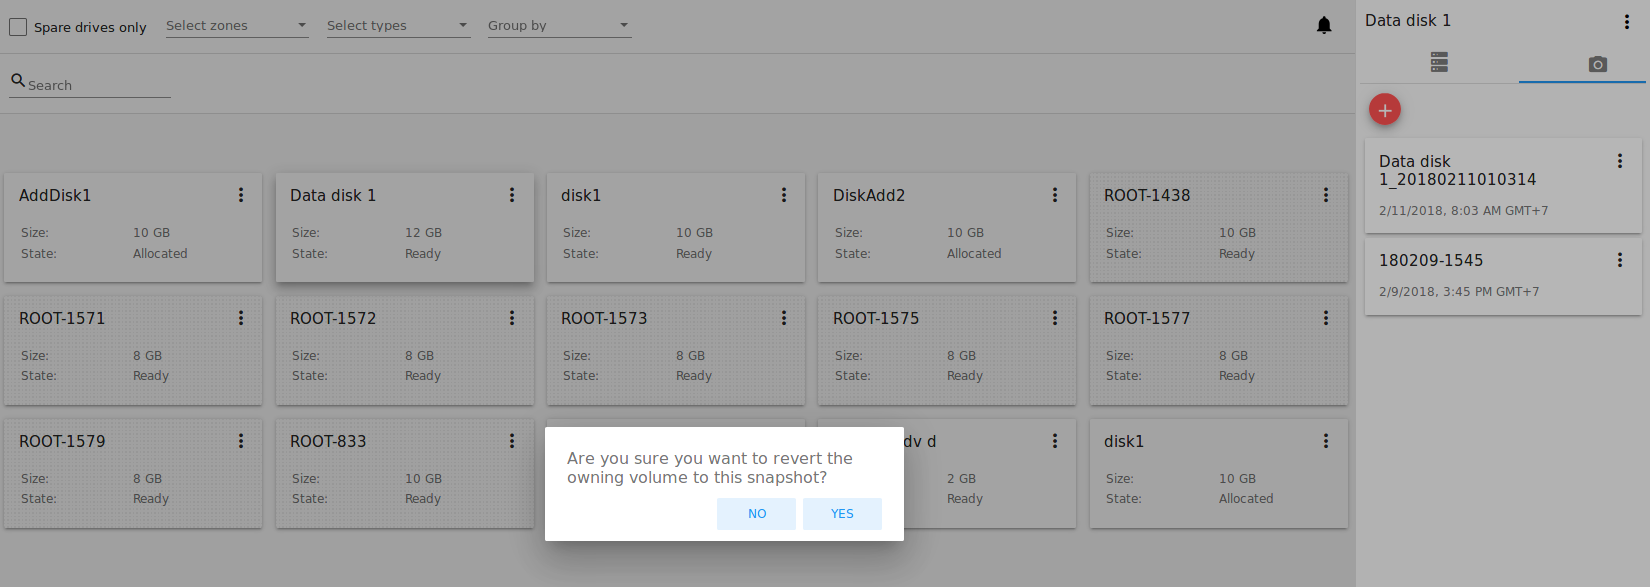
- Revert Volume To Snapshot - Allows turning the volume back to the state of the snapshot.
In the dialog box confirm your action. Please, note, the virtual machine the volume is assigned to will be rebooted.
- Delete - Allows deleting the snapshot. Click “Delete” in the Action box and confirm your action in modal window. The snapshot will be deleted. Click “Cancel” to cancel the snapshot deleting.
Volume Action Box
Action on drives are available under the Actions button ![]() .
.
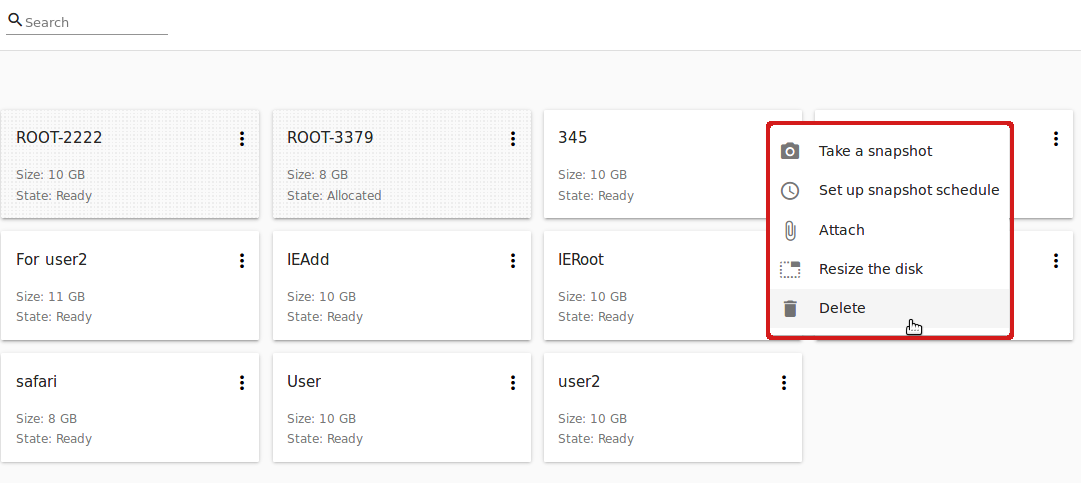
The following actions are available on disk:
For root disks:
- Take a snapshot;
- Set up snapshot schedule;
- Resize the disk.
For data disks:
- Take a snapshot;
- Set up snapshot schedule;
- Detach;
- Resize the disk;
- Delete.
Take a snapshot
You can take a snapshot of the disk to preserve the data volumes. Snapshots can be taken for disks with the “Ready” status only.
Click “Take a snapshot” in the disk Actions list and in the dialog window enter the following information:
Note
Required fields are marked with an asterisk (*).
- Name of the snapshot * - Define a name for the snapshot. It is autogenerated in the form
<date>-<time>. But you can specify any name you wish. - Description - Add a description of the snapshot to know what it contains.
All snapshots are saved in the list of snapshots. For a snapshot you can:
- Create a template;
- Delete the snapshot.
See the Snapshots Action Box section for more information.
Set up snapshot schedule
This action is available for disks with the “Ready” status only.
You can schedule the regular snapshotting by clicking “Set up snapshot schedule” in the Actions list.
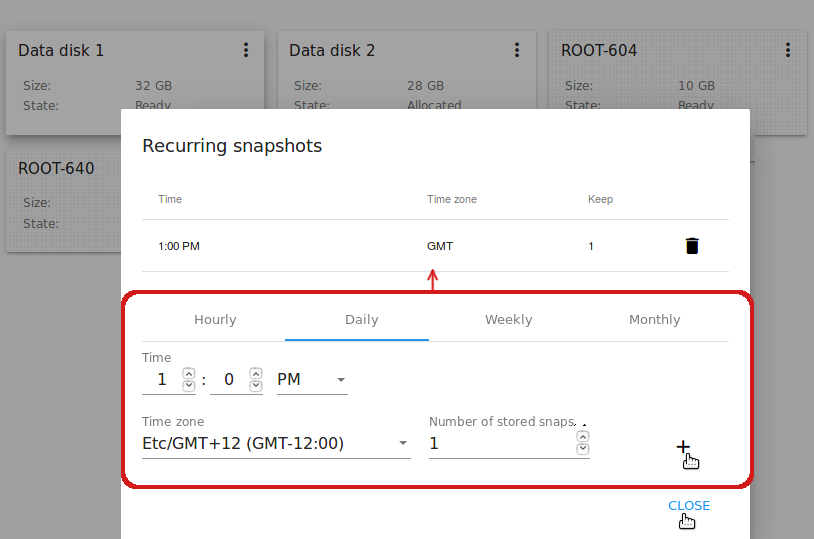
In the appeared window set up the schedule for recurring snapshots:
- Select the frequency of snapshotting - hourly, daily, weekly, monthly;
- Select a minute (for hourly scheduling), the time (for daily scheduling), the day of week (for weekly scheduling) or the day of month (for monthly scheduling) when the snapshotting is to be done;
- Select the timezone according to which the snapshotting is to be done at the specified time;
- Set the number of snapshots to be made.
Click “+” to save the schedule. You can add more than one schedule but only one per each type (hourly, daily, weekly, monthly).
Resize the disk
Note
This action is available to root disks as well as data disks created on the base of disk offerings with a custom disk size. Disk offerings with custom disk size can be created by Root Administrators only.
You can change the disk size by selecting “Resize the disk” option in the Actions list. You are able to enlarge disk size only.
In the appeared window set up a new size and click “RESIZE” to save the edits.
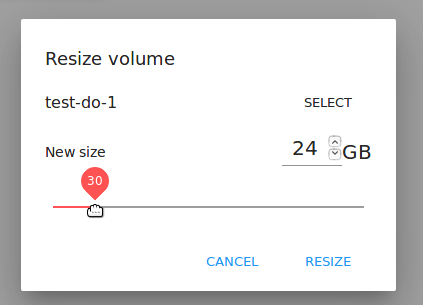
Click “Cancel” to drop the size changes.
Attach/Detach
This action can be applied to data disks. It allows attaching/detaching the data disk to/from the virtual machine.
Click “Attach” in the Actions list and in the dialog window select a virtual machine to attach the disk to. Click “ATTACH” to perform the attachment.
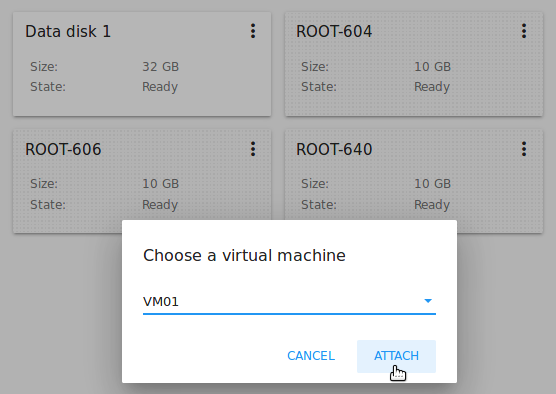
An attached disk can be detached. Click “Detach” in the Actions list and confirm your action in the dialog window. The data disk will be detached from the virtual machine.
Delete
This action can be applied to data disks. It allows deleting a data disk from the system.
Click “Delete” in the Actions list and confirm your action in the dialog window.
If a volume has snapshots the system will ask you if you want to delete them as well. Click “YES” to delete the snapshots of the volume. Click “NO” to keep them.
The data disk will be deleted from the system.